How to Edit Videos Using Animaker?For 2020 Youtube Starters

There are plenty of ways to edit videos. Some time it is very easy & Some time it is very hard. In this article, we will learn the easy way.
I love this famous quote, write without fear & edit without mercy.

when it comes to editing you need to just forget about the efforts you have put to create the video. The time spent you in front of the cameras.
Just cut whatever you think is not relevant to the audience.
……
How to edit a Video Stey by Step?
Step 1: Transfer the Video to a laptop.
If you have already recorded your video in Mobile or Camera. Just transfer the same to your laptop. if you have used any video recording software just download the same.
For iPhone users: Just airdrop to your Mac.


For Android / Camera Users, use your USB based file transfer.
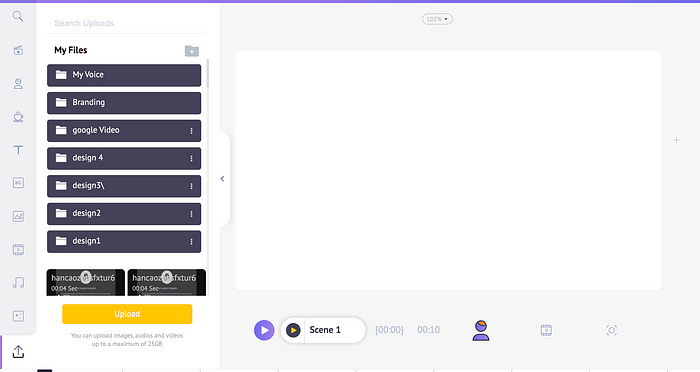
Step 2: Open Animaker.com & Upload your Video
Open your chrome browser & Just signup here https://app.animaker.com/register & you need to verify your account via email before using it. Once you verify & login. You will be on the below dashboard.

Once you hit the Create button you can select a blank project & the app will be loaded.
Step 3: Upload your Video
Use the uploaded tab at the left bottom of the library.

Use can also just drag & drop your video to the workspace.
Step4: Edit the Video
Once you drag & drop you don't need to wait for the video to get uploaded you can start editing. Use the edit icon to start editing.


you can also upload multiple videos & create new scenes. You can also use Timeline to add new scenes & edit directly from the same place.

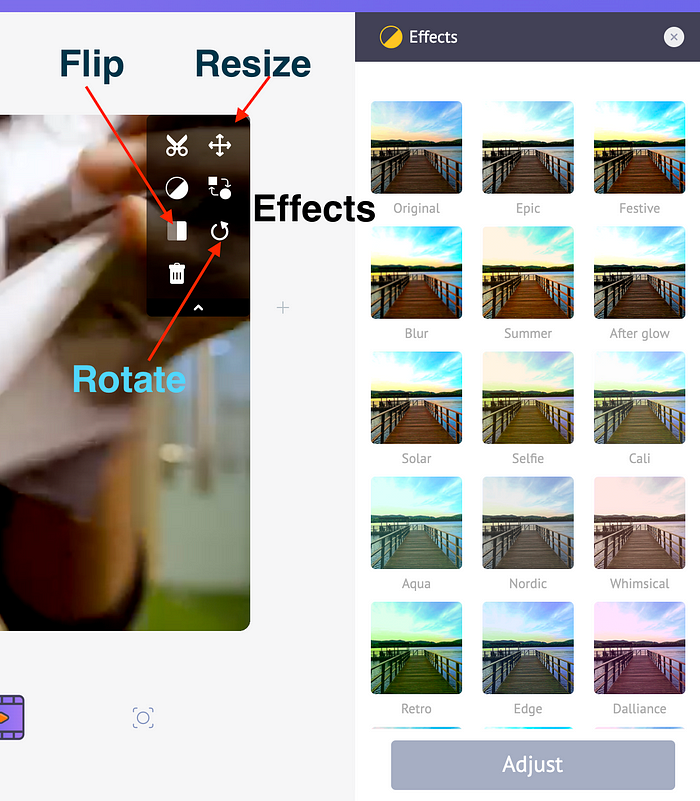
you can also flip, rotate, resize & add effects.
Step 5: Text Effects & Animation
The beauty of Animaker 2.0 is you can edit videos & add animation on top of it with few easy steps.
Text effects & animations

Props, Shapes & Emojis

Stock Images & Videos (100 Million+ collections)

You can edit these props, shapes, texts using an animation timeline.

Music Library & Music timeline: You can add from the library by drag & drop & also edit the music using the timeline.

You can also add screen effects & scenes transition effects.

Step 6: Publish & Download
You can select the publish button to render this video from the Animaker cloud. The render time is usually based on quality of the video, effects used, length of the video & queue availability.

Download the video by selecting the quality you want. But the quality of the video is also based on the video you have recorded.

You can use videos like screen recording, mobile-based videos, etc.
You also watch the below videos to learn more about video editing using Animaker.
To get started, just click here to start editing your videos. (click here)